Xcode
A step by step guide to exporting your build to Waldo.
There are two supported options to export your iOS simulator build to Waldo:
- with Waldo CLI — which we highly recommend
- from Xcode
Exporting your iOS simulator build with Waldo CLI
If you haven’t yet installed Waldo CLI, simply follow the instructions here.
Once you have verified that Waldo CLI is correctly installed, exporting your iOS simulator build can be as simple as typing two commands into your terminal window.
Here’s the first command:
waldo add ios --upload_token <<waldoUploadToken>>
The waldo add command performs the following actions:
- It first searches the current working directory (and then its parent directories) for a configuration file named
config.ymlin a hidden directory named.waldo. - If
waldo addfinds an existing configuration file, it uses that. Otherwise, it creates an empty.waldo/config.yml. - It then attempts to add a recipe named “ios” to the configuration file (assuming a recipe with that name does not already exist). The name “ios” is arbitrary. You can name your recipe pretty much anything you want.
- If
waldo adddetermines that there is more than one way to generate a build in the current working directory, it will ask you a series of multiple choice questions to construct the recipe. For example, if the current working directory contains more than one Xcode project or workspace, it will ask you which project or workspace it should use. If the chosen project or workspace defines more than one scheme, it will ask you again which scheme it should use. And so on. - Finally, if you specify the
--upload_tokenoption,waldo addassociates the upload token with the recipe. While this is not required, it is preferable that you do it now in order to avoid you having to specify it later whenever you wish to upload a build generated by this recipe.
Once you have added a particular recipe to the configuration file, you need not do it again. If you save your Waldo CLI configuration file in your source code repository, any one with access to the repository can make use of your recipe(s).
And here’s the second command:
waldo sync ios
The waldo sync command is simply a shorthand for the waldo build followed by the waldo upload command. The waldo build command performs the following actions:
- It looks up the “ios” recipe in the configuration file.
- It then generates the actual build>> (using
xcodebuildin this case).
The waldo upload command performs the following actions:
- It looks up the “ios” recipe in the configuration file.
- It then attempts to find the actual build generated by the preceding
waldo buildaction. - Finally, if it finds the previous build,
waldo uploadattempts to send it to Waldo.
Tip: If you have only one recipe defined in your Waldo configuration, you can omit the recipe name from the
waldo synccommand (as well as thewaldo buildandwaldo uploadcommands).
That’s it! See waldo help and waldo help <command> for more information about what you can do with Waldo CLI.
Exporting an iOS simulator build from Xcode
If you choose not to use Waldo CLI, you can also export your iOS simulator build from within Xcode.
Before you can upload an iOS simulator build to Waldo, you must first export the ‘.app’ file from Xcode. Simply follow the steps below:
-
Launch Xcode and open the project or workspace for your application.
-
Choose an appropriate scheme, as well as a simulator, from the drop-down menu on the toolbar. It doesn’t matter which simulator you choose, any simulator will do.


- Choose Product > Build to build your application.

- When the build completes, choose Product > Show Build Folder in Finder.

- A folder containing your ‘.app’ file appears in Finder. You can upload this ‘.app’ file on Waldo!

- Zip your .app and drag and drop it into Waldo
or
Upload it with Waldo CLI as described in the preceding section.
Build for Apple Silicon / M1 chips / arm64 architecture
arm64 architectureAre my iOS builds Apple Silicon ready ?
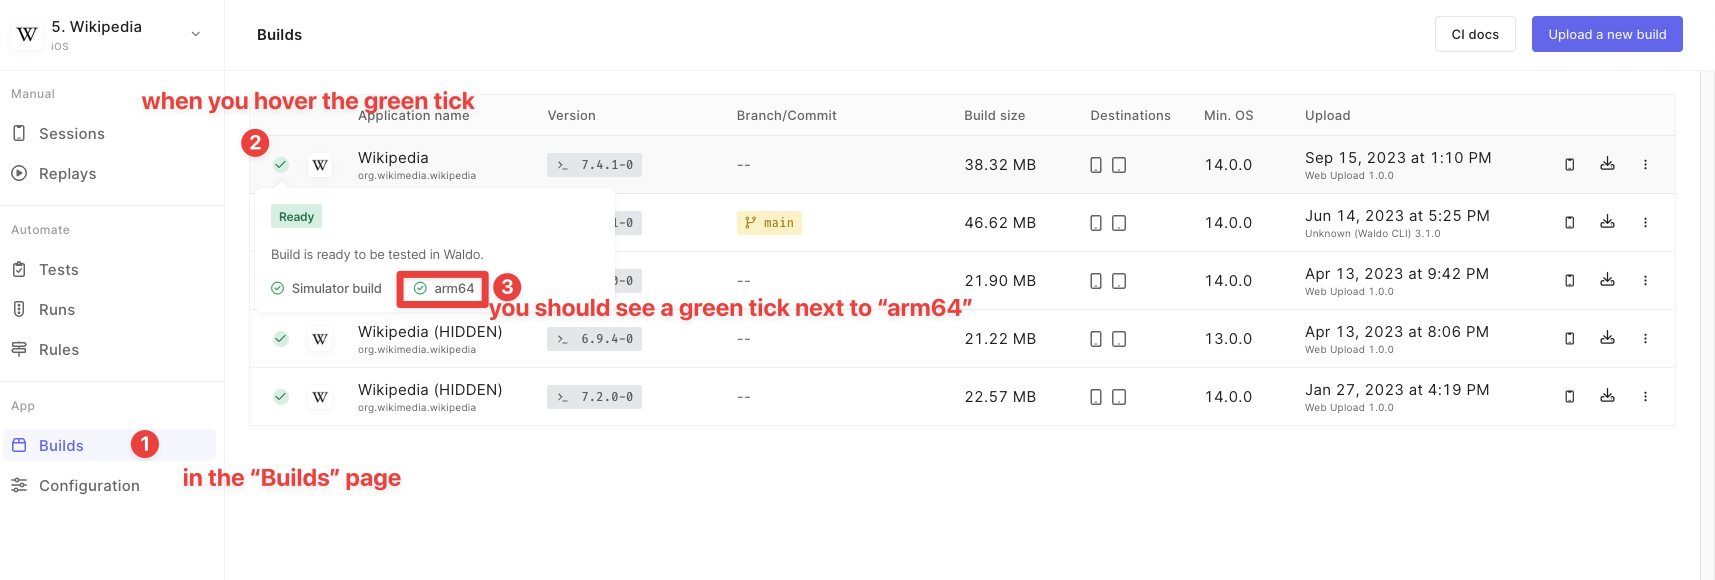
How to tweak my config to make it so
Xcode 12.2 and later automatically adds the arm64 architecture to the list of standard architectures for all iOS simulator binaries, including apps and libraries. During the debugging and testing process, Xcode builds only for the current system architecture by default.
The Xcode config of your target should be set like in the image below: (the popover menu must read Standard Architectures (arm64) - $(ARCHS_STANDARD))
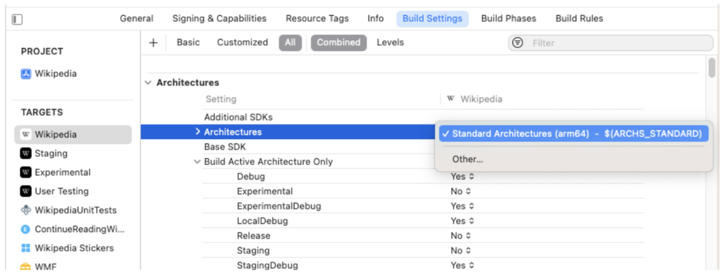
This is the easiest (and safest) way to edit the Xcode configuration file that will be used by your CI to generate your simulator build.
Troubleshooting
If you encounter trouble while uploading a new build of your application to Waldo, you can refer to the following:
- This instructional video: https://waldo.wistia.com/medias/ra5quk70x8
- Diagnosing your upload failure
Updated 4 months ago