Adjusting Time Limit (Step loading time)
Waldo optimizes the time between interactions when replaying a test to ensure that it runs as fast as possible.
Waldo waits for the screen to stabilize before replaying the next interaction. Specifically, Waldo waits until the element that triggers the next interaction becomes available.
An important example
Consider a flow with a screen that holds a simple view containing two buttons:
- Button
Amust be clicked to navigate to the next screen. (This click is the interaction that demarcates the end of this step in the flow.) - Button
Bis not used in this particular flow but displays a loading state that depends on an API call (for example, to determine from the backend if the user can click on buttonB).
Imagine that when you record this test for the first time, everything goes smoothly, and button B does not enter the loading state.
Another possible outcome is button B getting stuck in the loading state while replaying the test. This could happen if there is an issue with the backend, thus giving button B a required event to move from the loading state.
In this precise scenario, the replay of the test would continue even if button B is stuck in loading state if there is an assertion on buttonB.
This example demonstrates why assertions are essential to testing that your backend is behaving properly. To achieve this you can add an assertion onto the element that is conditional to a certain state.
As a consequence, Waldo will increase the waiting time between the 2 steps to ensure to get the correct state to compare.
How do assertions affect the time between interactions?
Waldo spends a little bit more time between interactions when defining assertions on a step to ensure that the evaluation of assertions is accurate!
This amount of time added between steps is not considerable and deemed necessary in effectively catching bugs in a test run.
Time limit
In the previous example, we saw how Waldo ensures a correct state for comparison before moving to the next interaction.
But it happens that you want to be in control of the time spent between 2 different steps, this is the reason for introducing the Time Limit.
Basically, you will be able to define the maximum of time to wait before moving automatically to the next interaction, regardless of whether or not you defined assertions on the current interaction.
This could be really helpful when:
- you need to wait a long time for a step e.g. to load images/videos before,
- you need to enforce going quickly between 2 steps e.g. to click on a banner that closes/disappears quickly.
Adjusting a time limit
You can see the maximum of time that Waldo waits before moving to the next step from the test view. It is possible to adjust thanks to the Editing time limit button that you can find on a step modal.

Now you can select the new time to wait between steps, to persist your changes hit the Save button:
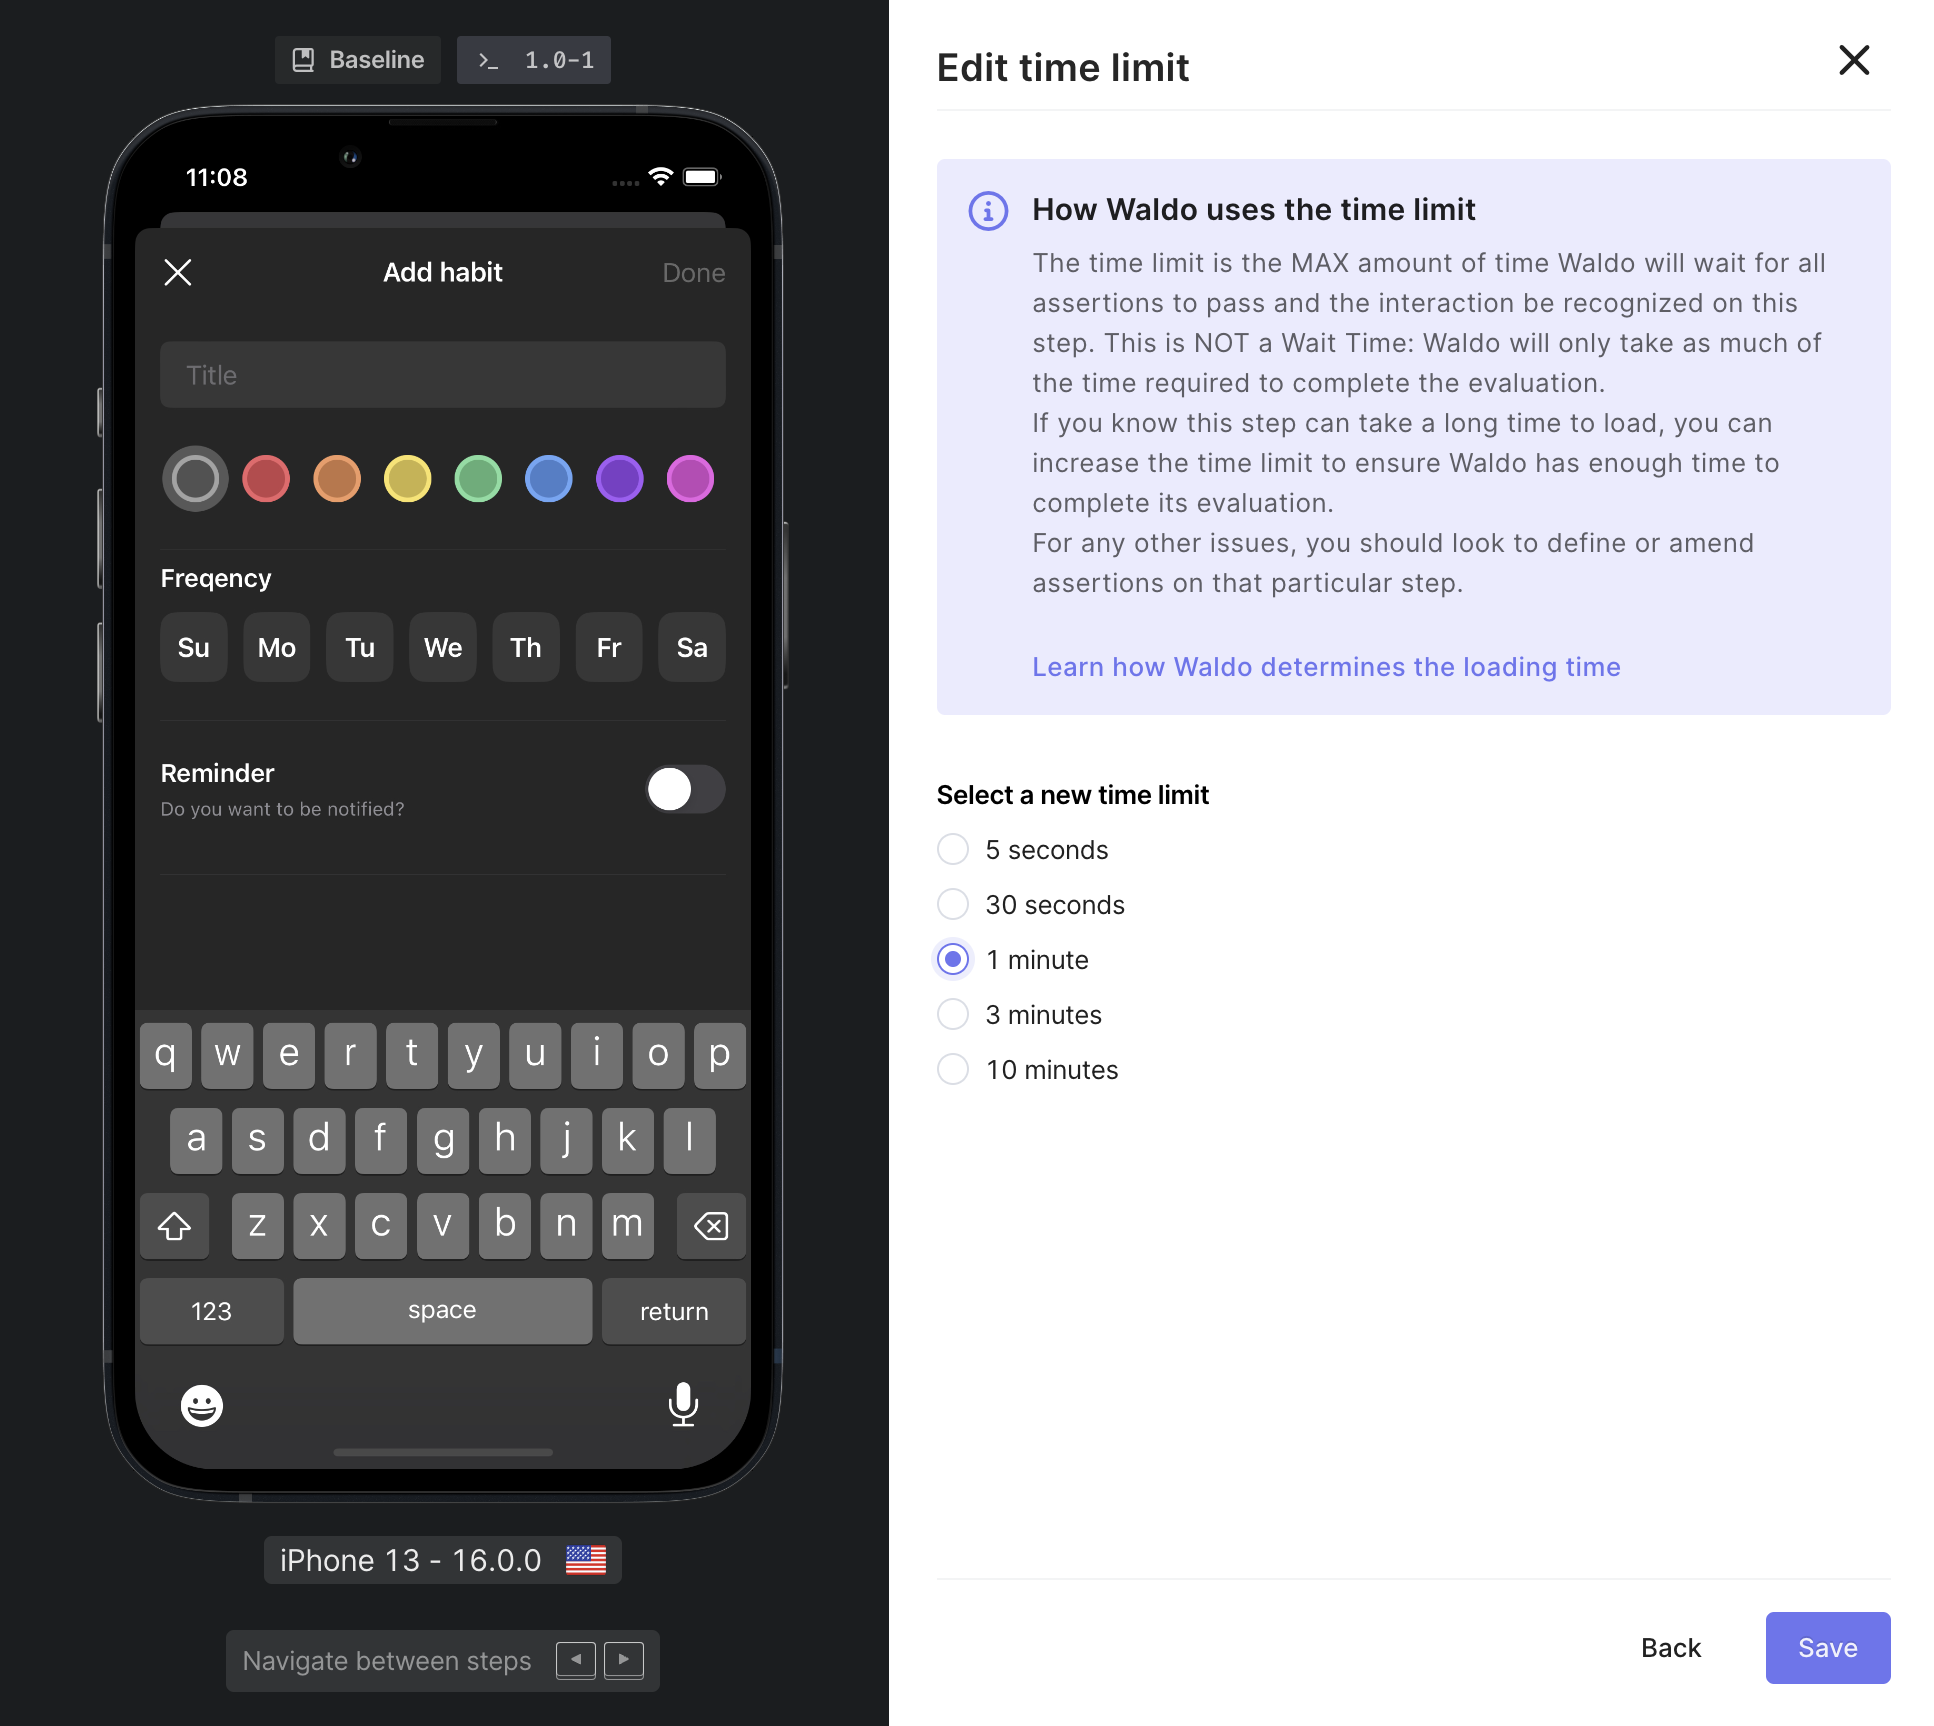
This change will affect all the versions of this test i.e. all the device configurations.
A similar view is available on the run view:

Please note that adjusting time from the run view is only available when a step has crashed or has a failing assertion.
Updated 6 months ago