Fixing Assertions
Recovering from assertion failure
Fixing your application
Typically, a failing assertion indicates a bug or regression in the latest build of your application you triggered the run for.
Once you fix the bug, upload the patched build of your application and trigger a new run that includes the failing test. Repeat this process with patched builds until all assertions evaluate to true.
Editing or deleting an assertion
In some cases, a failing assertion is “expected”. Typically, this occurs when you have purposely modified your application such that the assertion needs adjustment or is no longer needed at all. For example, you might purposely remove a button from a screen which you previously created a text assertion on.
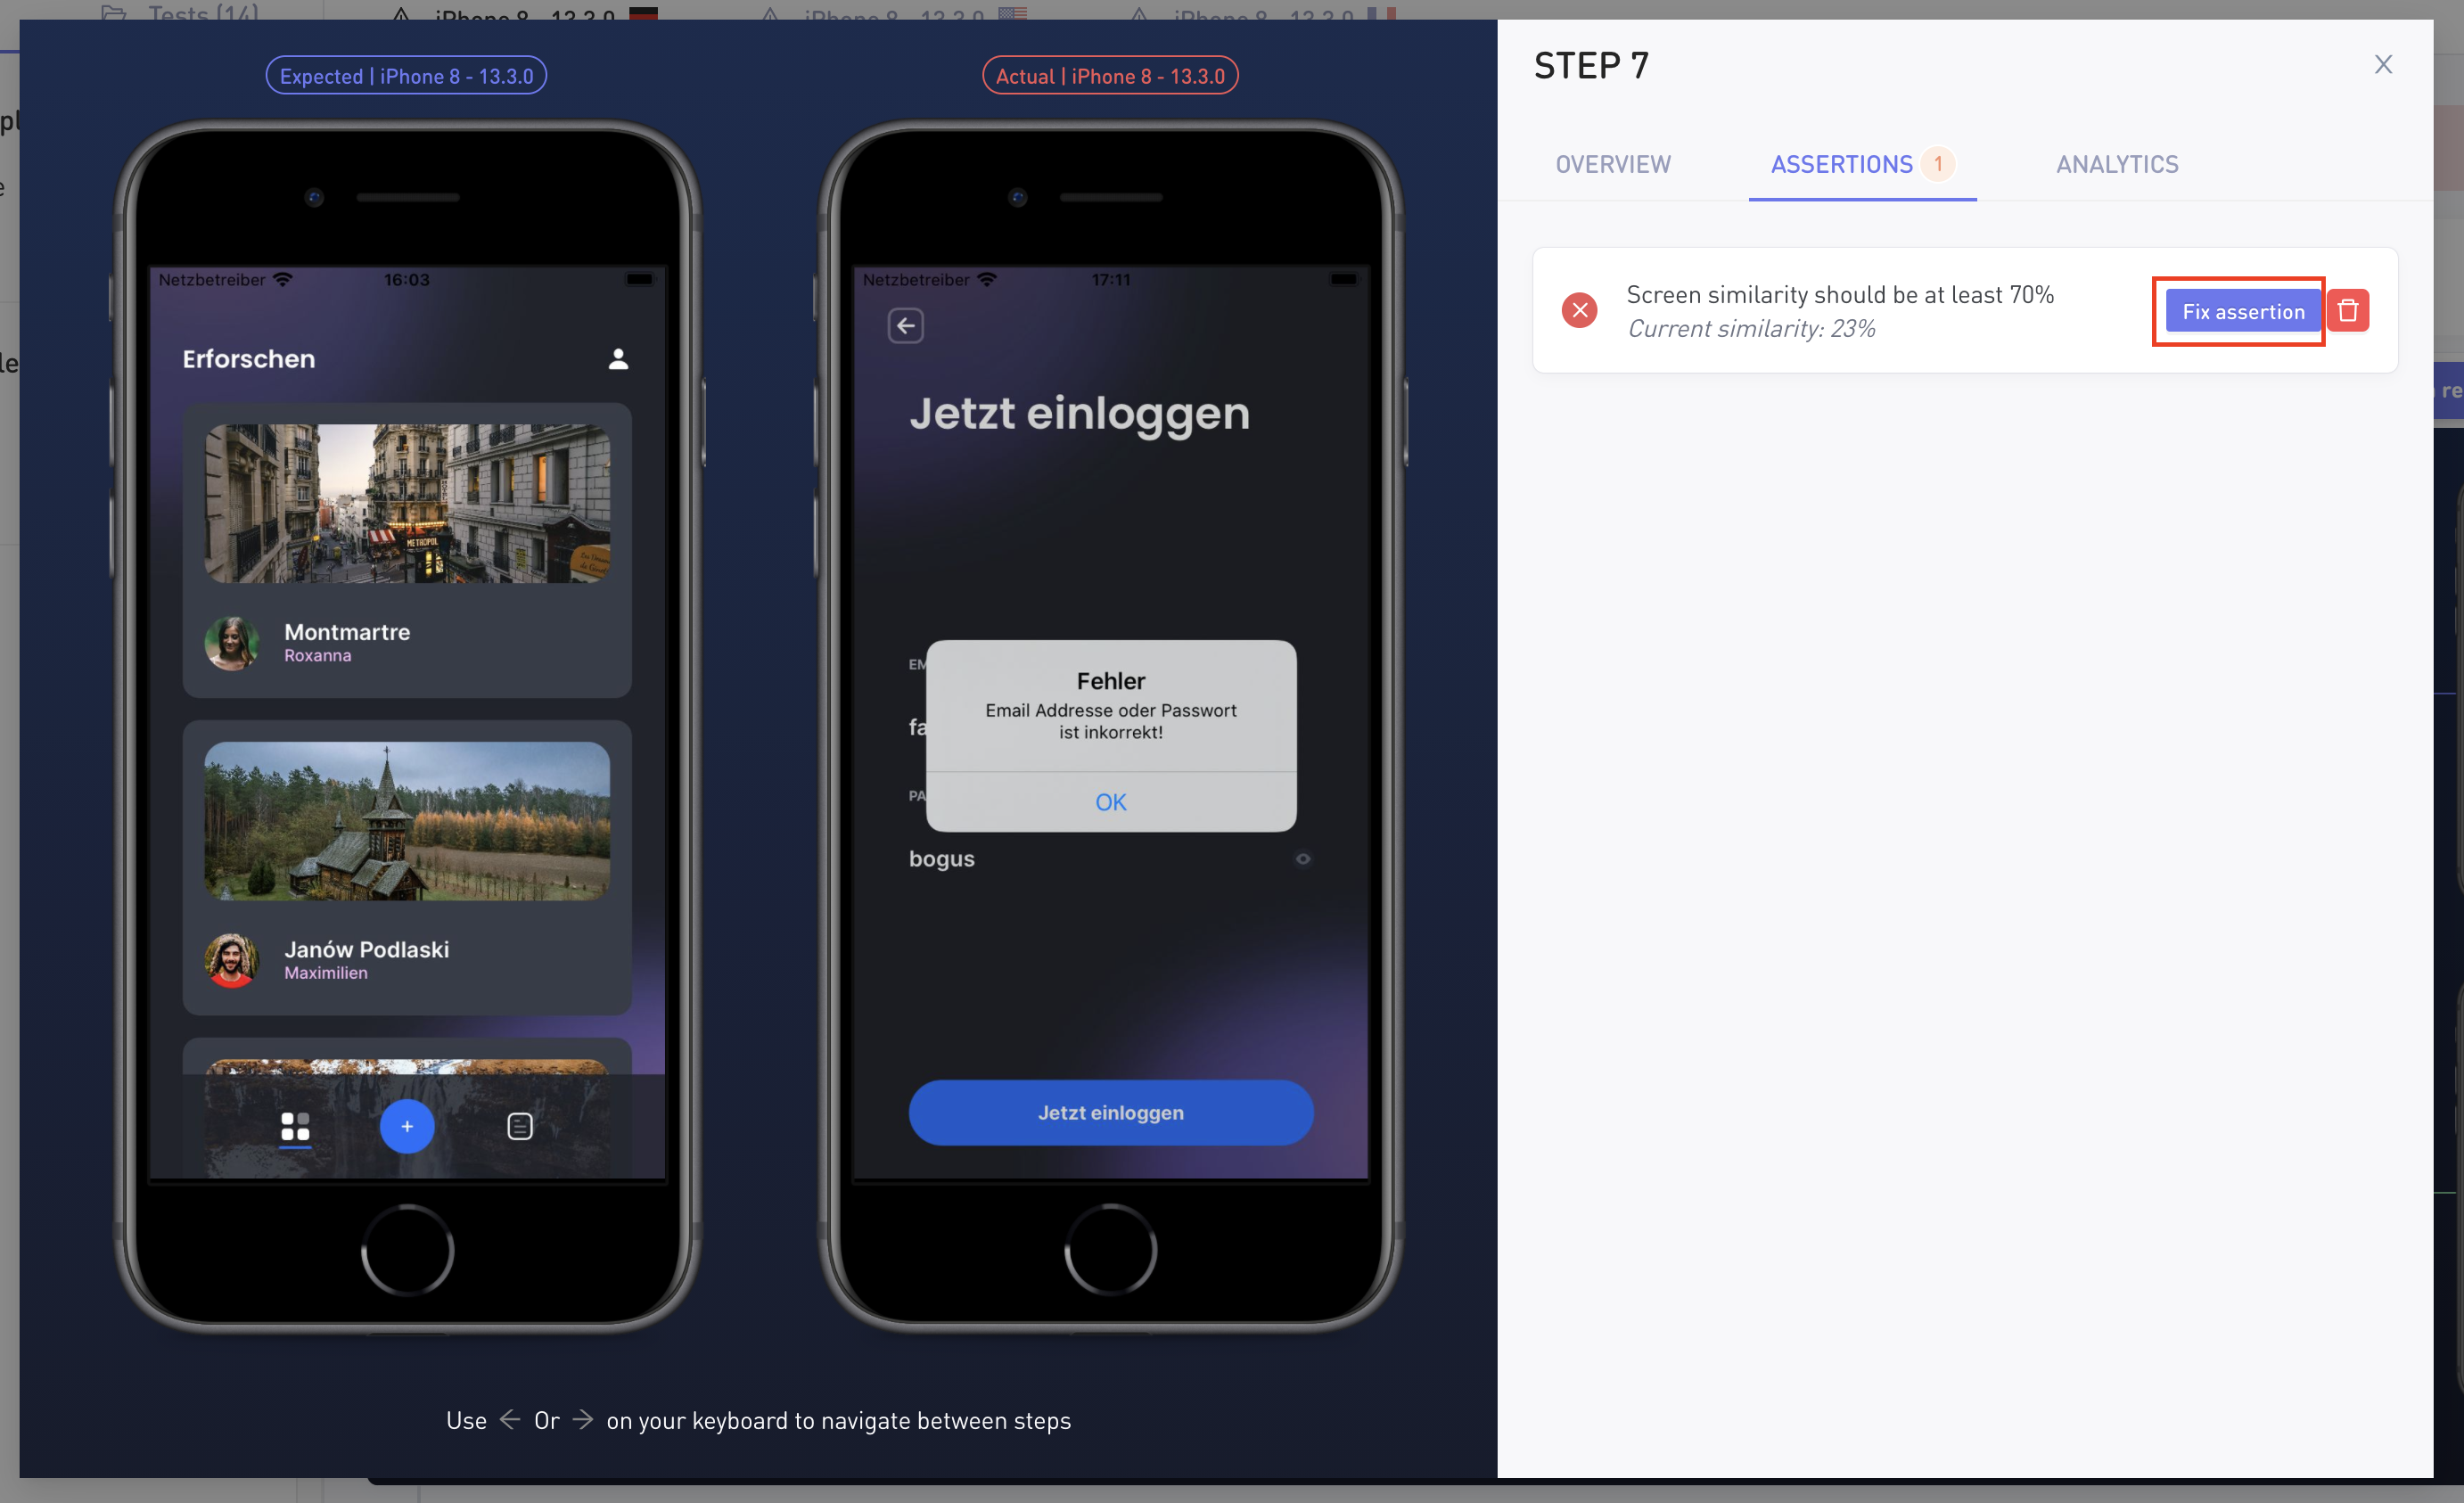
In such case, you can edit or delete the assertion as appropriate. You can do so directly from the run page of the failed assertion.
Simply click the screen with the failing assertion and then choose one of the following actions:
- Click the
Deletebutton to remove the assertion completely. - Click the
Editbutton to configure new values for the assertion.

Important:
-
This action affects the assertion that was defined on the canonical test i.e. the one viewed in the “Tests” overview. This means that your actions are not scoped per run but do affect all future runs on that same test.
-
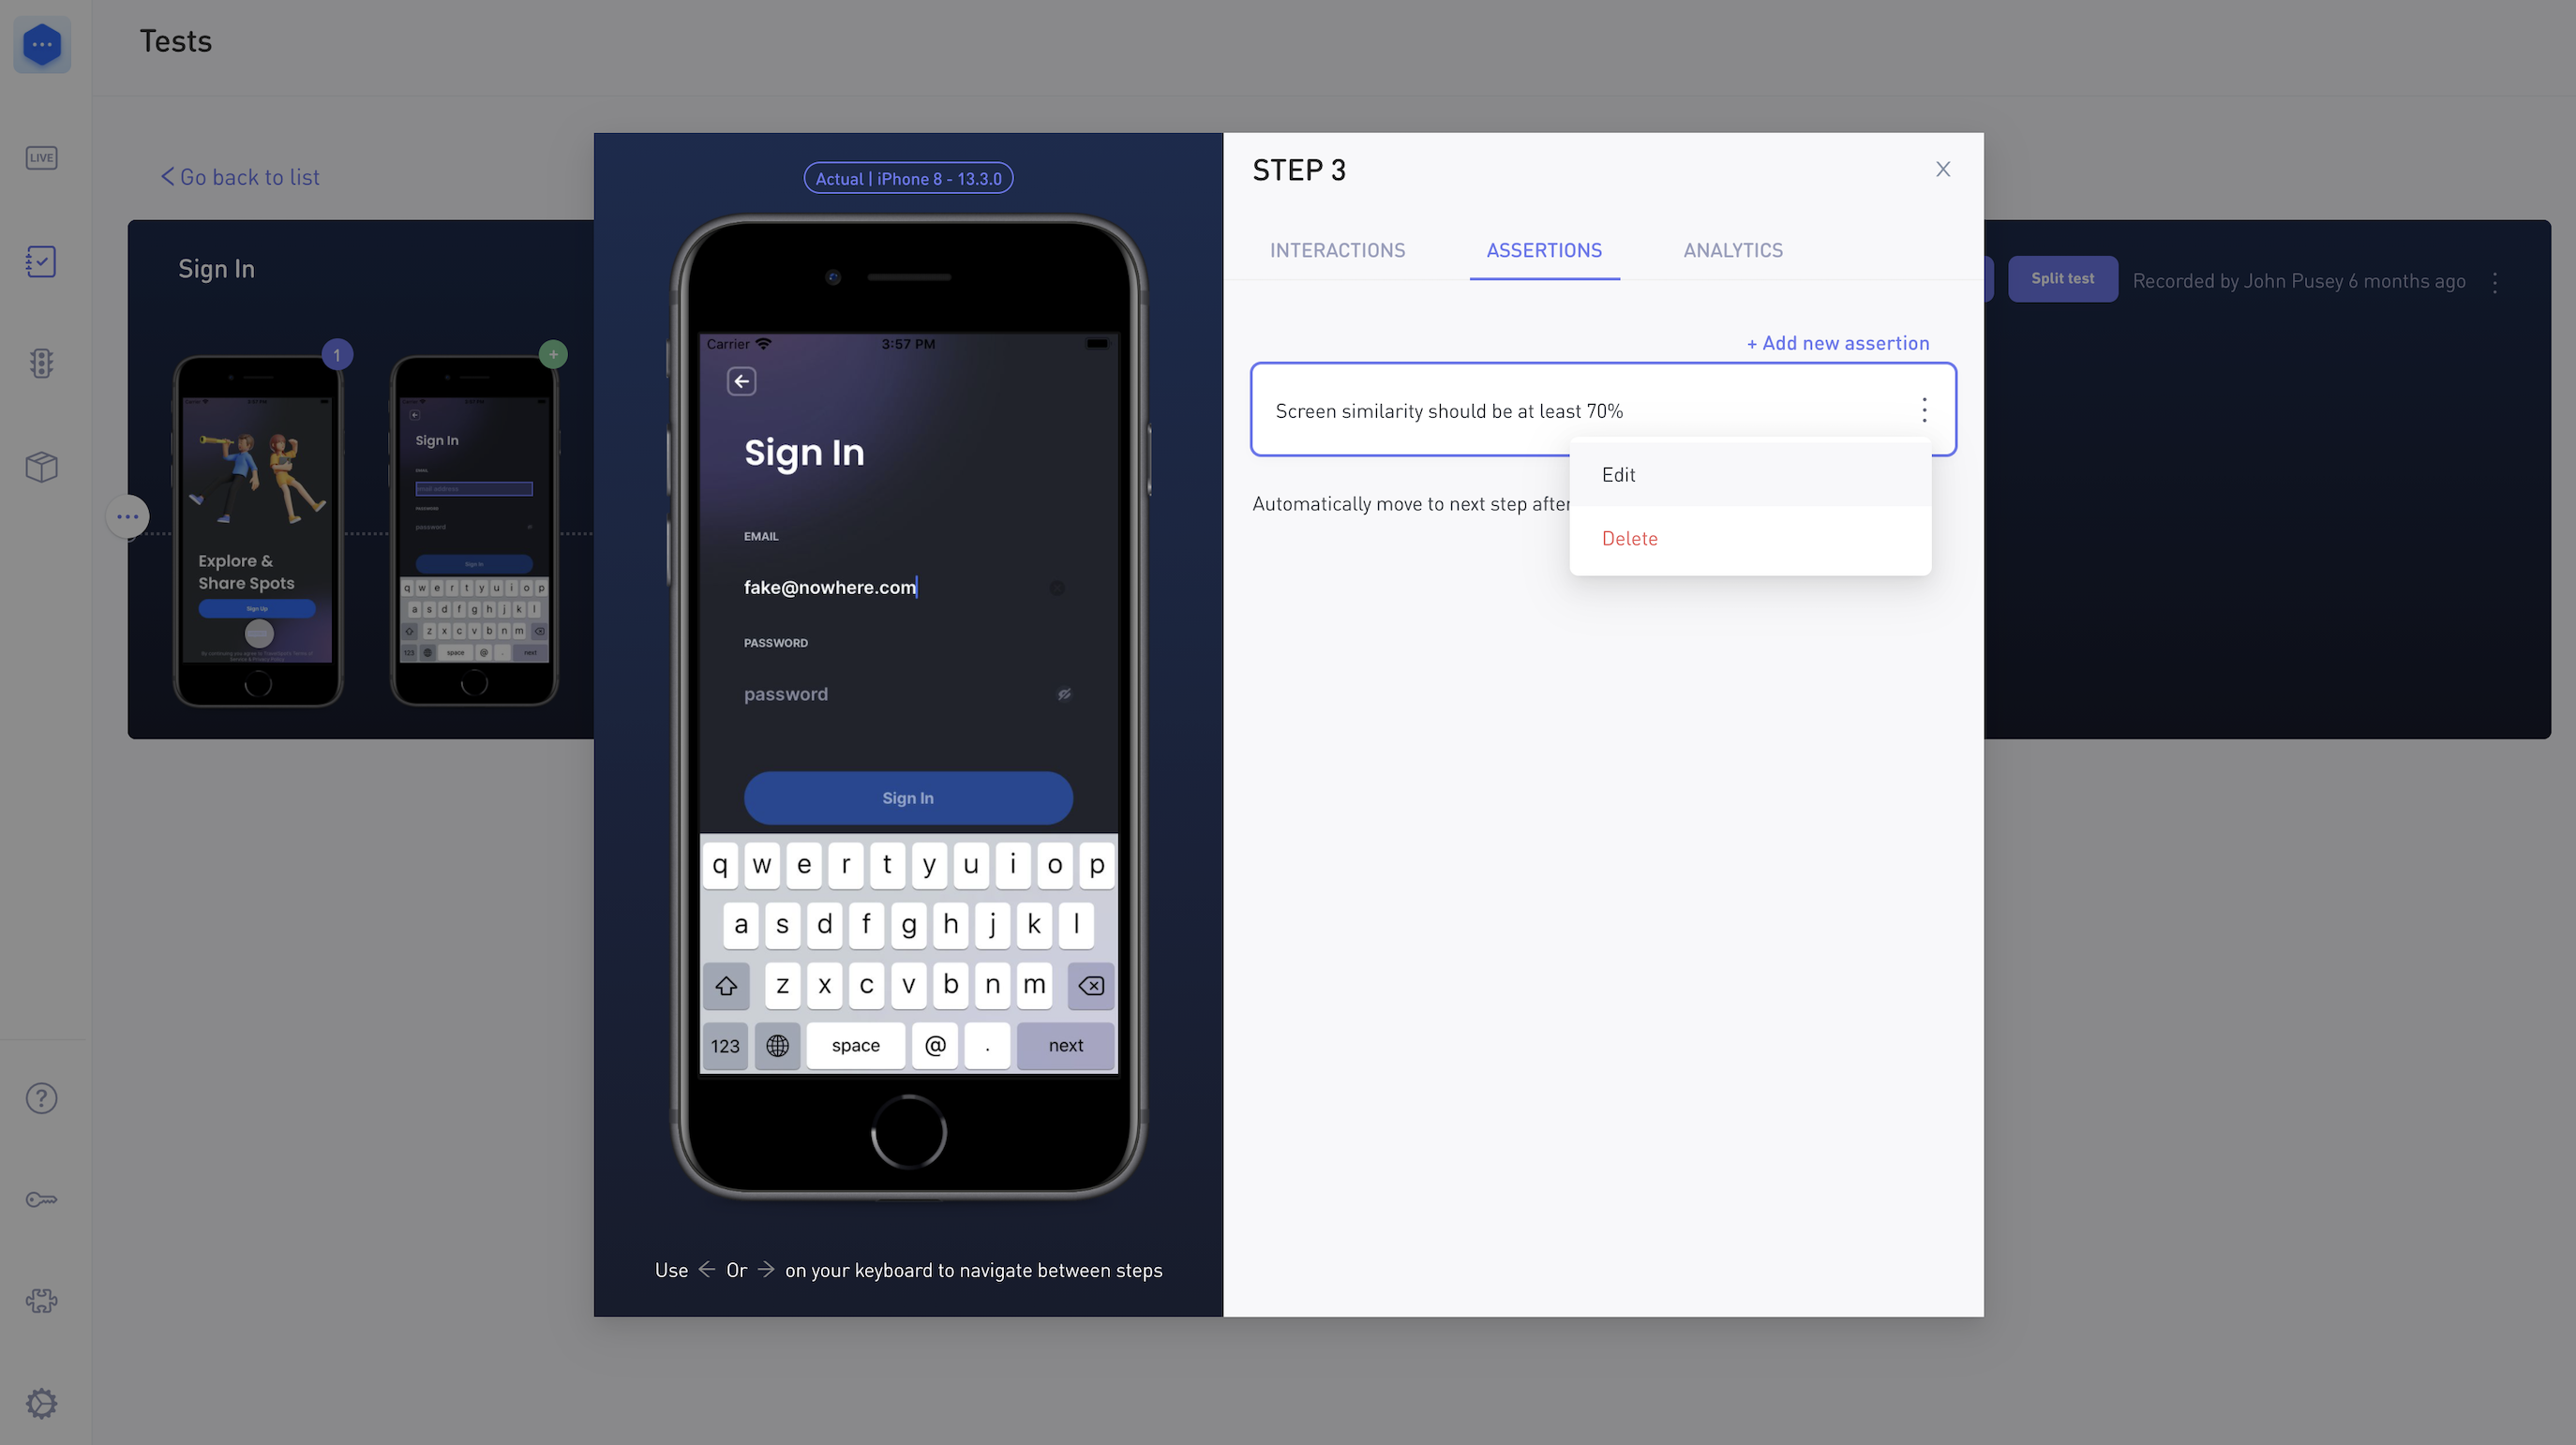
You can also perform the same actions on assertions through the “Tests” overview:
- Click on the screen you want to edit/delete assertion for,
- Click on the
⋮button for the assertion you want to change to access the menu and select action you want to perform:

Updated 4 months ago
