Xcode
A step-by-step guide to exporting a Waldo-compatible build of your iOS app.
Exporting an iOS simulator build from Xcode
Before you can upload an iOS simulator build to Waldo, you must first export the ‘.app’ file from Xcode. Simply follow the steps below:
-
Launch Xcode and open the project or workspace for your application.
-
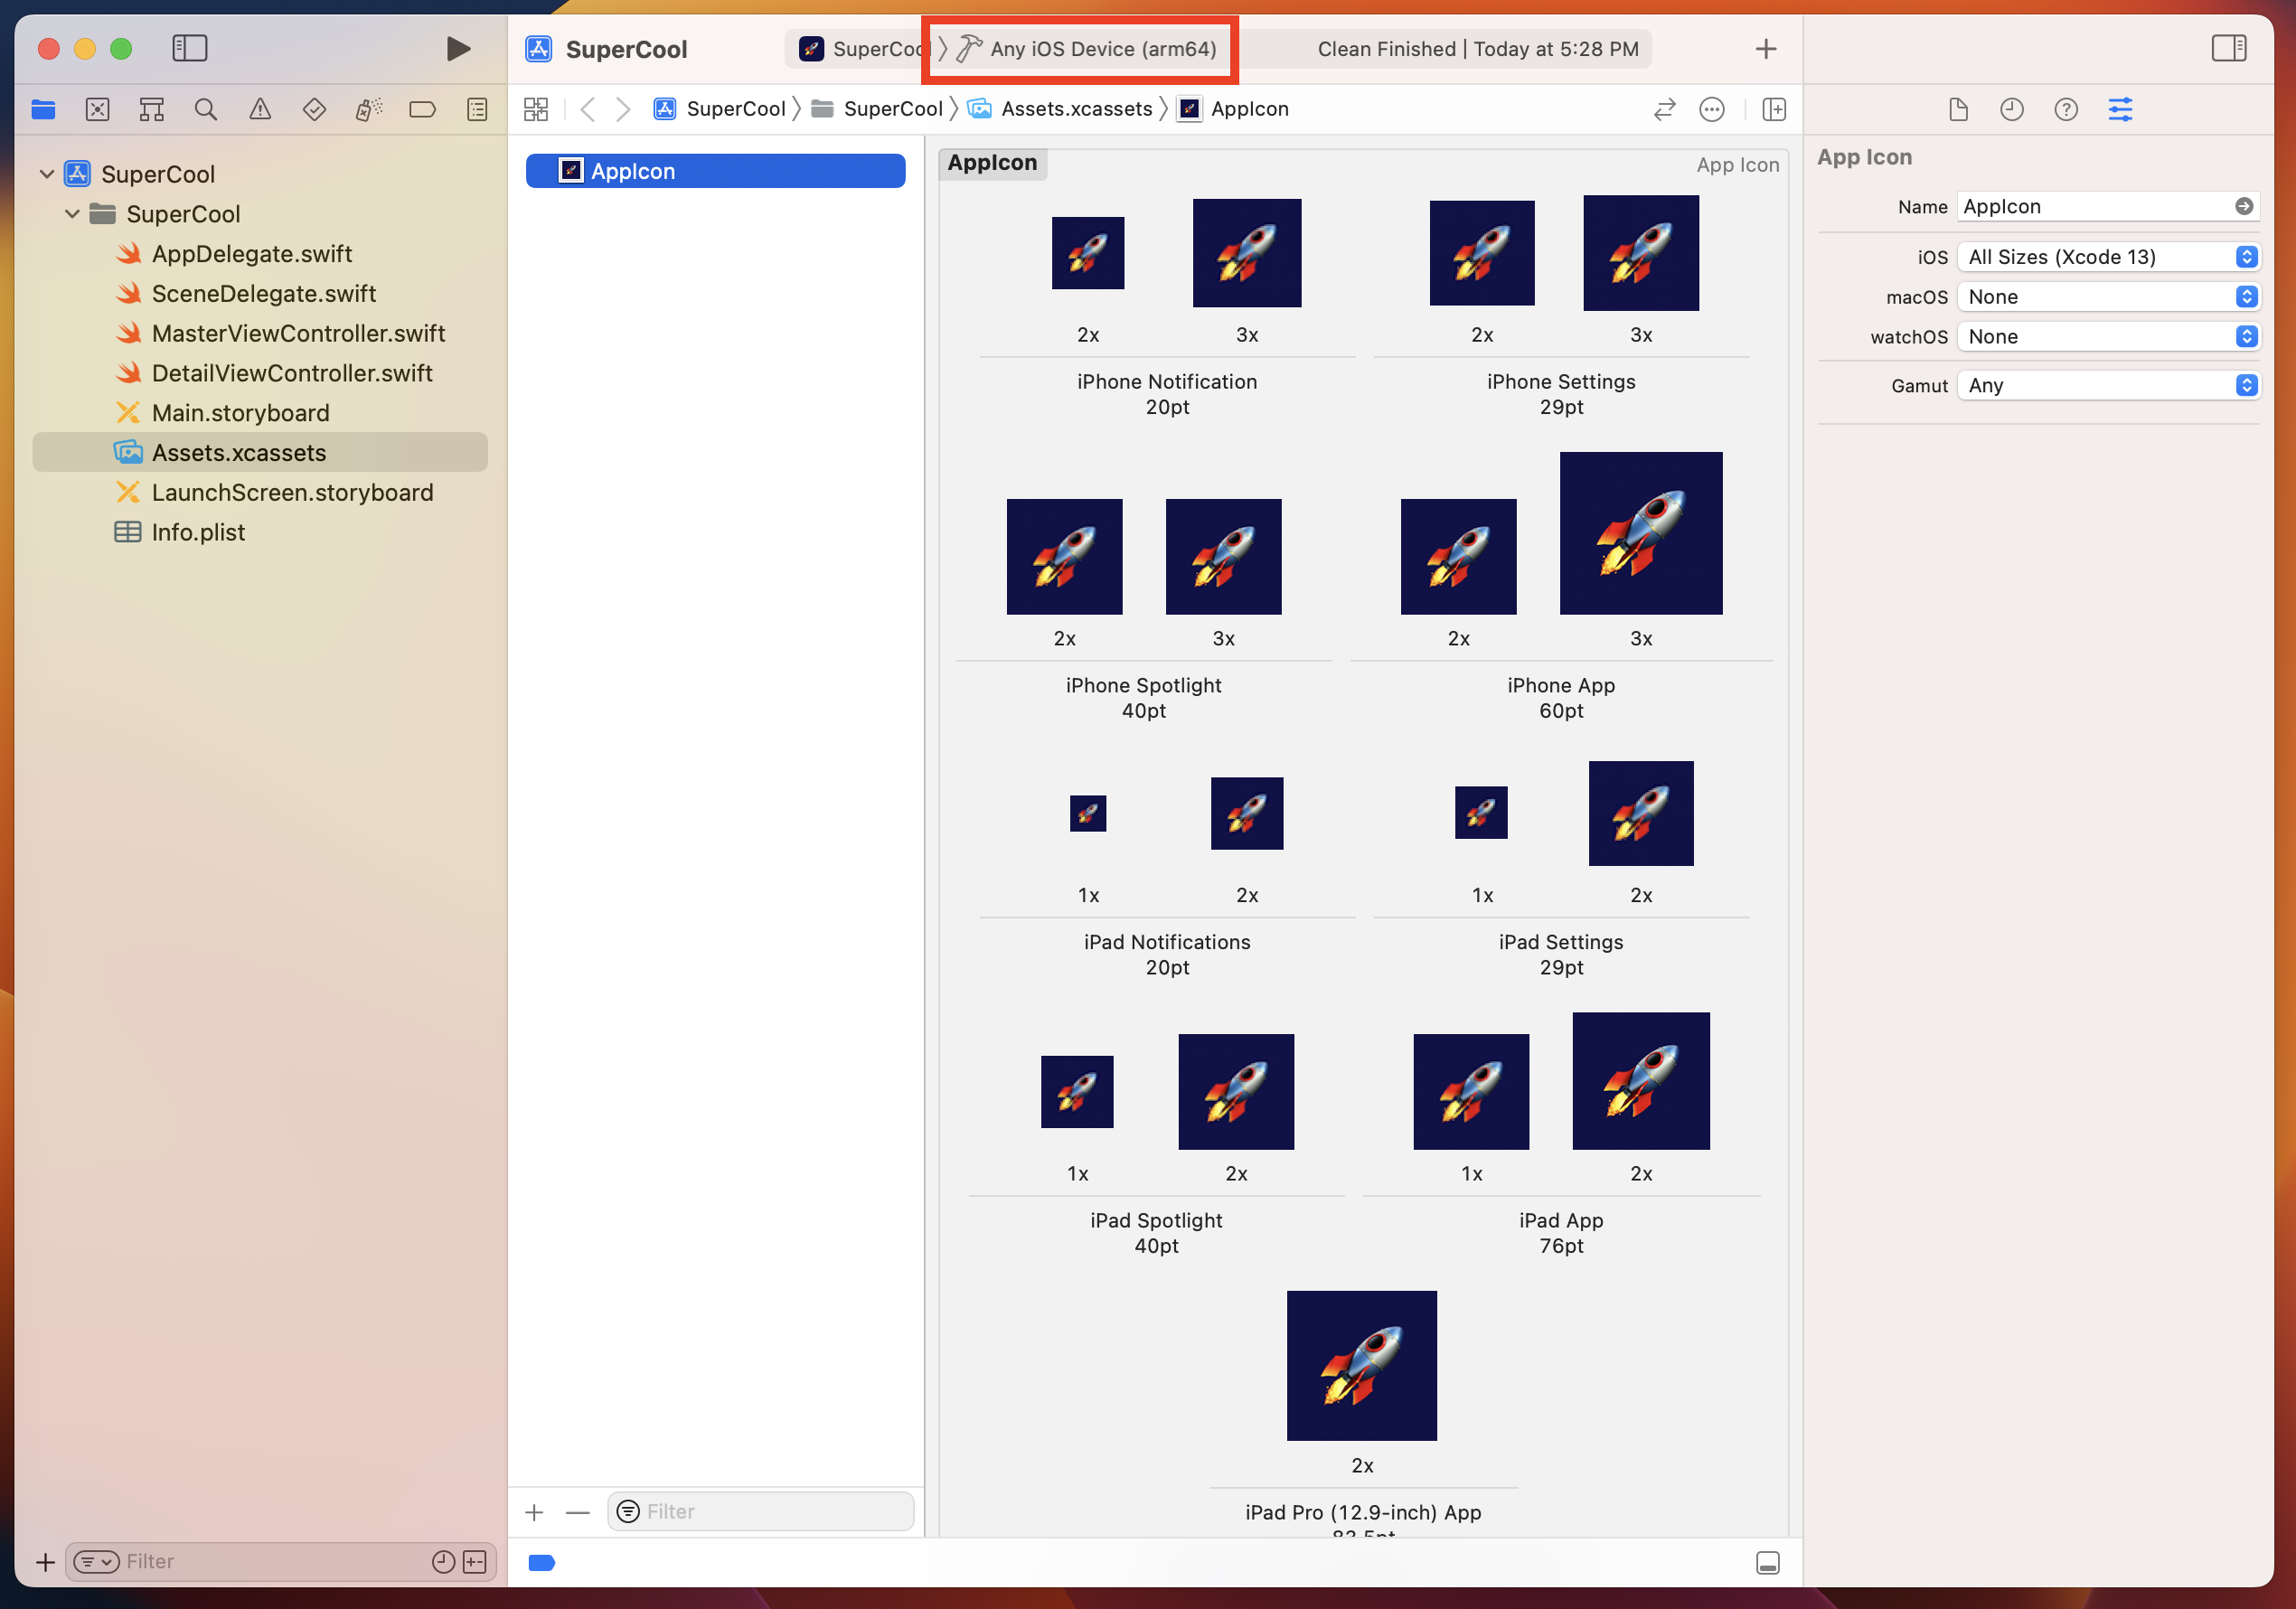
Choose an appropriate scheme, as well as a simulator, from the drop-down menu on the toolbar. It doesn’t matter which simulator you choose, any simulator will do.

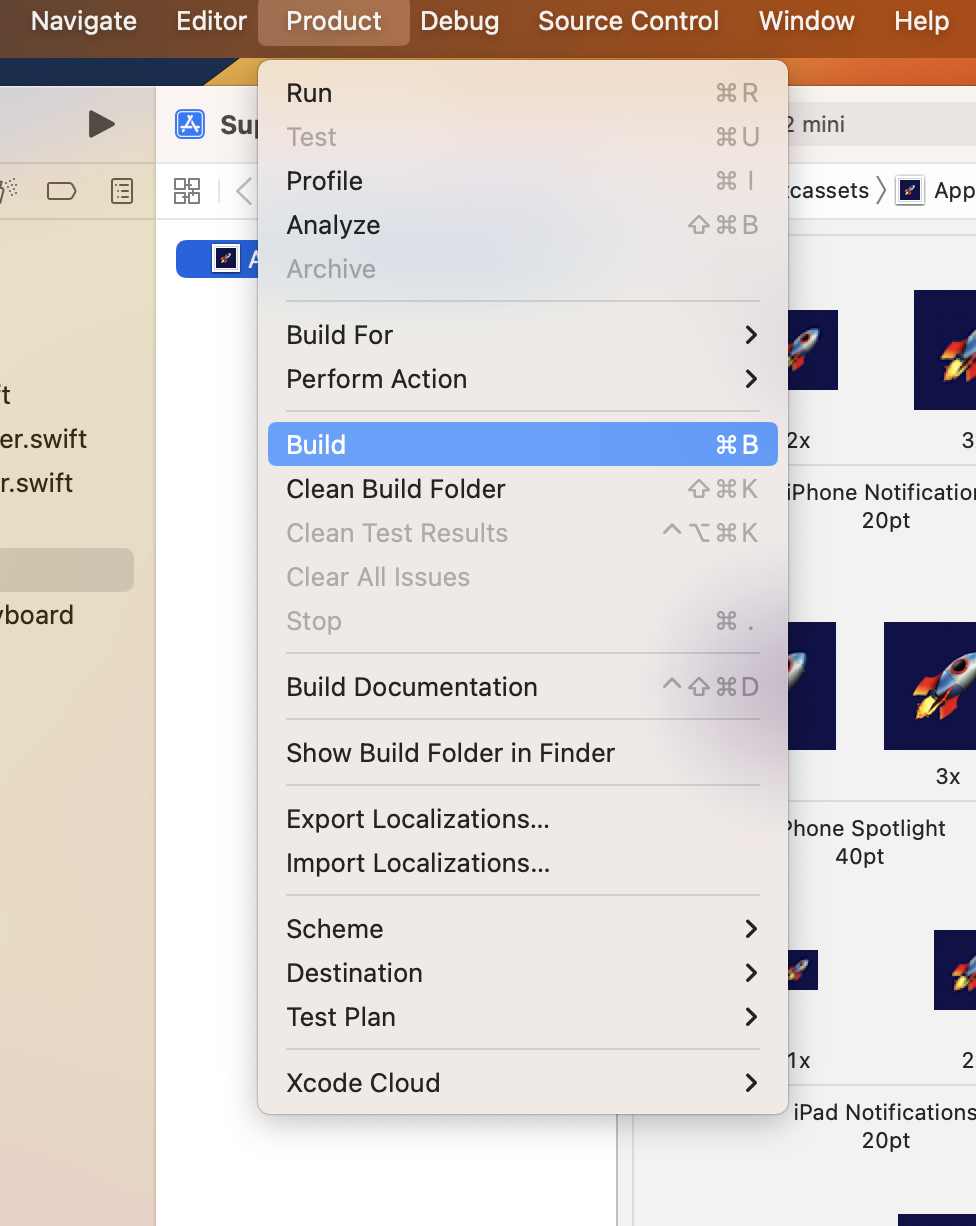
- Choose Product > Build to build your app.
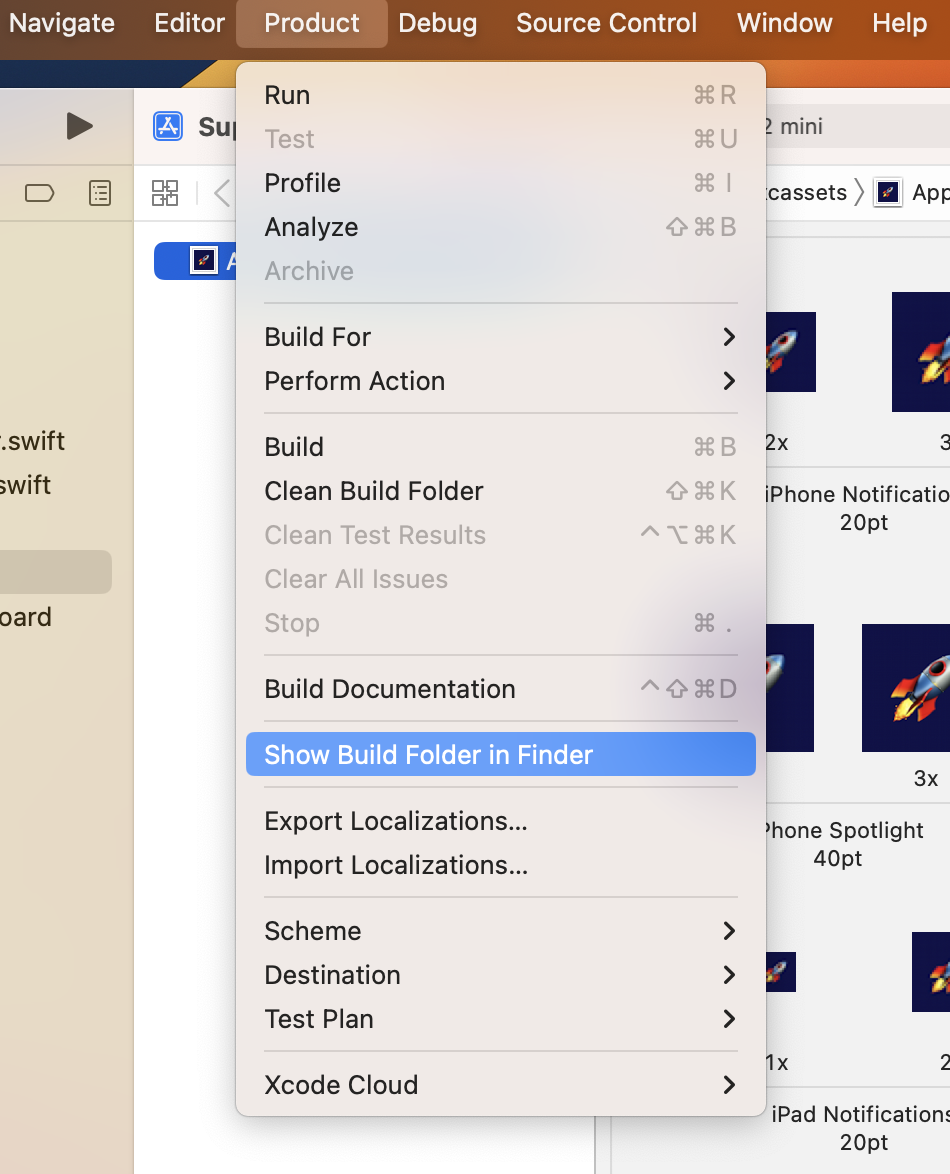
- When the build completes, choose Product > Show Build Folder in Finder.
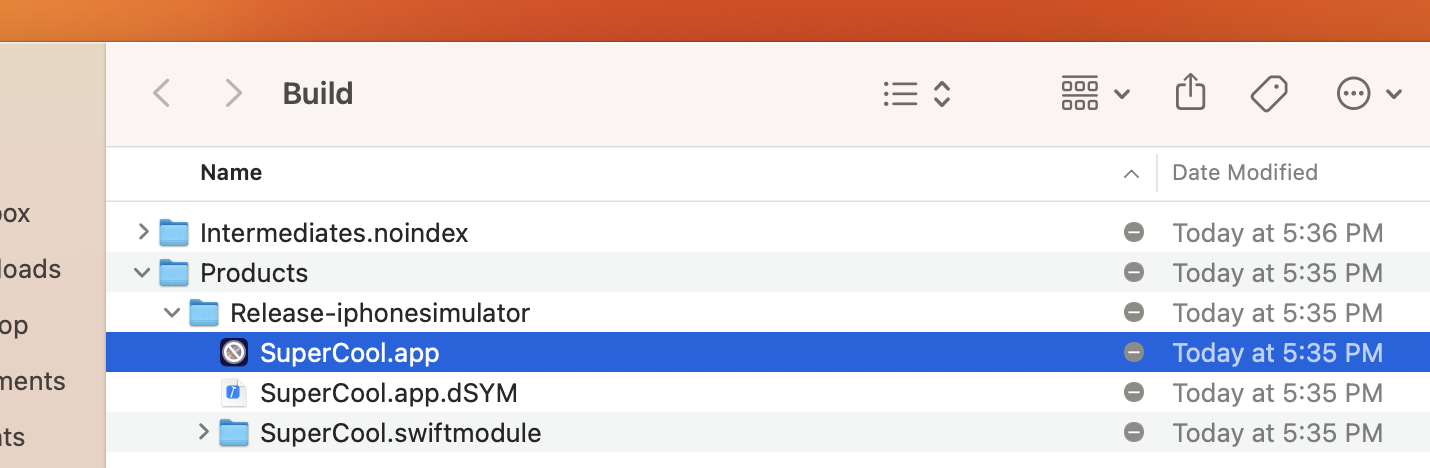
- A folder containing your ‘.app’ file appears in Finder. You can upload this ‘.app’ file on Waldo!
- Zip your ‘.app’ and then drag and drop it into Waldo.
or
Upload your ‘.app’ with Waldo CLI as described in the next section.
Building for Apple Silicon (M1 and M2) / arm64 architecture
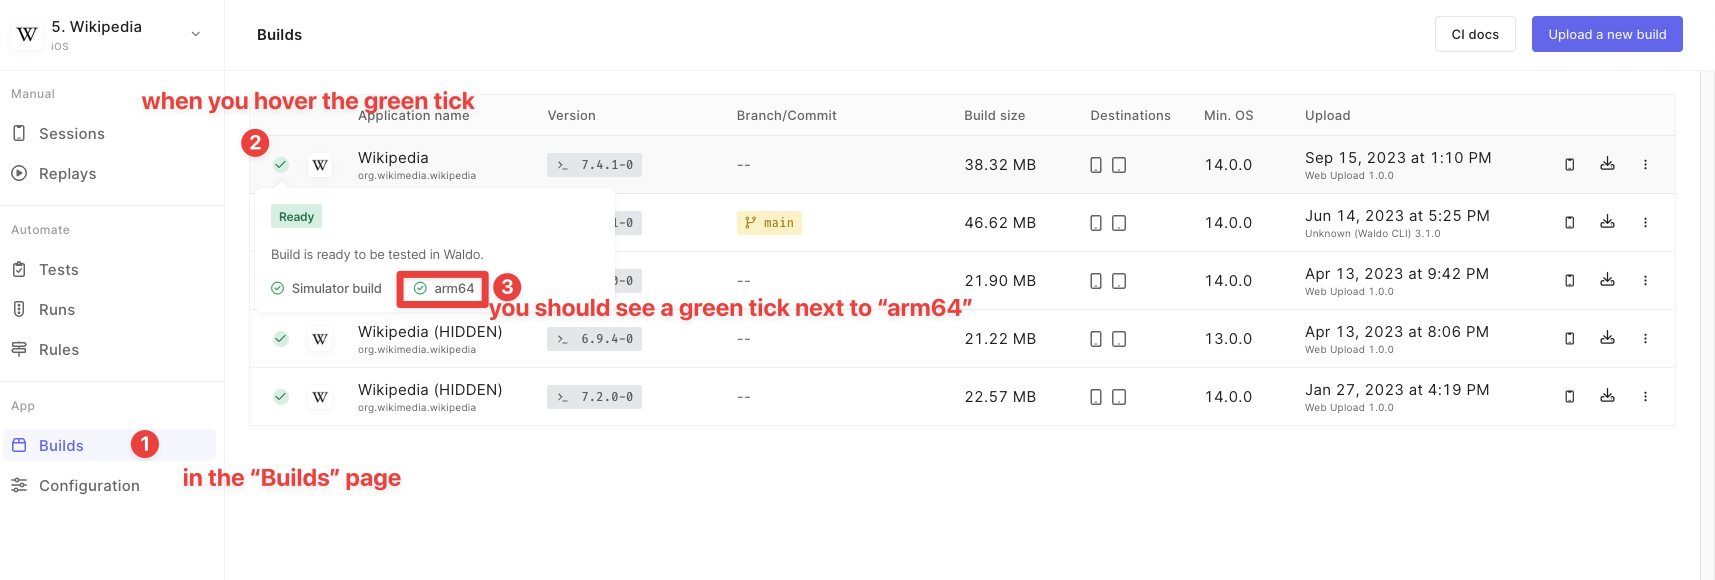
arm64 architectureIs your iOS build Apple Silicon ready?
Modifying your Xcode configuration to make it so
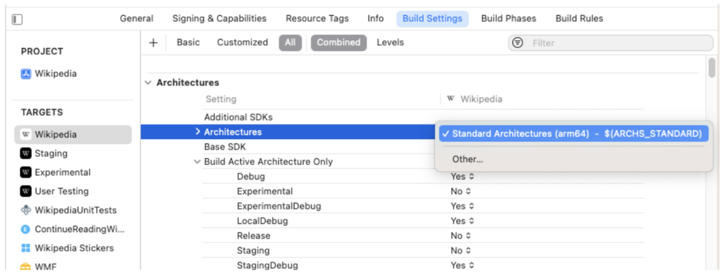
Xcode 12.2 and later automatically adds the arm64 architecture to the list of standard architectures for all iOS simulator binaries, including apps and libraries. During the debugging and testing process, Xcode builds only for the current system architecture by default.
The Xcode configuration of your target should be set to match the image below (the popover menu should read Standard Architectures (arm64) - $(ARCHS_STANDARD)):
This is the easiest (and safest) way to edit your Xcode configuration file so that you can correctly generate a simulator build of your app, both interactively in Xcode and from the command line (in your CI).
Troubleshooting
If you encounter trouble while exporting an iOS simulator build from Xcode, you can refer to this instructional video .
Updated 6 months ago